Shop Now

Monday, December 8, 2014

FCCB Challenge # 240, Anything But A Card

Happy Holidays 

My project for today is a treat box.  I wanted it to look like a gingerbread house.
I used Sweet Tooth Boxes for my Cricut cartridge. 


Another view

I cut the box out of brown paper and then decorated it like a gingerbread house and used the gingerbread cut from Paper Doll Dress Up and made a couple.  I used some scraps of paper, ribbon and gems to make most of my decorations.  The paper I used is from DCWV "Evergreen".

 Hope you join us for this weeks challenge.
Link up your project at FCCB.

Bye Bye for Now
KIM


Tuesday, December 2, 2014

FCCB Challenge #239 Beyond Red and Green

Hi! everyone. It's the countdown to Christmas.  The challenge today at FCCB is to make a Christmas project using colors other than the tradtional red and green.  I've seen a lot of decorations this year in pinks and blues.  Here is my card for inspiration today.


I used the following supplies:
Cricut cartridge Elegant Edges-scallops
Cricut cartridge Kate's ABC's - JOY
Spellbinders embossing folder-background
Fiskers stamp set for sentiment
Modge Podge mold and melting stick for birds

I embossed my card and then punched three evenly spaced 1" holes.  I cut the scallops to fit exactly over the holes for a frame using silver metallic paper from DCWV.  I stamped my sentiment and then heat embossed it with silver.  I punched three 1" circles out of the same paper and placed inside my card for my letters.  Some white silver edged ribbon and two doves and I was finished.  The hardest part was matching the scallop frames to the circles.

Hope you will all join our challenge.  
Link up your projects using any colors but red and green.

Bye, Bye for Now
KIM

Monday, November 17, 2014

Challenge #237 at FCCB

Ready to embellish?  This weeks challenge is to use 3 embellishments.  But hey who wants to stop at three.  On my card I used Create- a-Critter to cut our this adorable Reindeer.  This is the first time I have used him/her.  So easy to piece together and so cute.


My three embelishments
Stamping
Stickles
Rhinestone Bling
PLUS
Ribbon

The paper stack is DCVW "Evergreen"  from last year.  I made a couple of mini albums and have some scraps leftover which I used.  The reindeer is cut from Coordinations Chocolate Lovers pack from Joann's (perfect colors).  The string of lights are also cut from Create-a-Critter.

Now it's your turn.  Just link up to our challenge at FCCB.
Remember to use a Cricut cut and list your cartridge.
Have FUN.

Bye Bye for Now,
KIM

Tuesday, November 11, 2014

Christmas Joy

The  Challenge for November at Gecko Galz is "Christmas Joy".

I used two collage sheets, "Christmas Cuties" and "Christmas Icons 2" for my images and made gift tags for Christmas.

Here are all four of them

I cut the tags from George and Basic Shapes Cricut cartridge. I sprayed them with Santa Red  and Dazzling Diamonds Glimmer Mist. I used two different stamps sets for the background. Fiskers "Season's Greetings" and G45 Christmas.  I used leftover flowers trims and ribbon and stickers from last year that only had one or two left in the package. I also added Diamond Stickles for some bling. Great way to use up scraps.

Here below are close-ups pictures of each tag.


I will be entering my tags in the Gecko Galz November challenge.  Join in the fun.

Which tag do you like best?  My fav is the first one, but they are all CUTE!

Bye Bye for Now, 
KIM

P>S> Check back in soon, I will be adding Christmas projects  frequently.  Gearing up for the Holidays.  I always make all my cards and tags as well as my gifts and packing.


Click here if your looking for FCCB Challenge project.


Sunday, November 9, 2014

FCCB Sketch Challenge # 236

This week at FCCB we are having a sketch challenge.  Here is the sketch below for you to interpret any way you want. Make sure you add a Cricut cut and let us know what cartridge you used.


This is the card I came up with using the sketch as my guide.


I used Create -A- Critter for my penguin.  I think he is so adorable. I added a red ribbon for his scarf and black flat-back pearls for is eyes.  The paper I used is from DCWV "Artic Wishes".

The sentiment is a  Fiskar's stamp set called "Season's Greetings".

I used a Martha Stewart snowflake punch for my top border and added some blue bling.  I heat embossed it with silver embossing powder in three layers.

For my scalloped border I used Elegant Edges Cricut cartridge.

For the little dots of snow I used white Glossy Accents.  To finish it off I added the white ribbon with the silver edges. 

Now it's your turn. Link up your project at FCCB this week.

Bye, Bye for Now
KIM

Wednesday, October 29, 2014

Halloween Jeepers Creepers

Gecko Galzs Jeepers Creepers Challenge

I am entering the following Halloween card into the Gecko Galzs challenge for this month.  They are having their annual Halloween Blog Hop October 30 - November 1, 2014.

I used the "Witches" collage sheet for my image.


I layered the image on black cardstock and added a border cut from a Spellbinders die in orange.  I embossed orange cardstock with a spellbinders embossing folder and highlighted some of the diamonds with Stickles, Black Diamond.  The sentiment is from My Creative Time.  The trick and treat are from the "Halloween Circle and Squares" collage sheet from Gecko Galz.  I used glossy accents and popped them up for dimension.

Join me tomarrow at Gecko Galz for lots of Halloween fun and inspiration.

If you are looking for my FCCB challenge card click HERE.

Bye, Bye for Now,
KIM 


Monday, October 27, 2014

FCCB Challenge #234 Fright Night

Happy Halloween 

Hope every one is all ready for trick or treaters. I made this card really fast today.  The longest part of the preparation was piecing the vampire.  There are alot of little layers to put together, but I think he was worth it.  I used the Happy Haunting cartridge and cut him at 3.25".


The background and sentiment are from My Creative Time, "Spooky Starry Night".
I tied a black and white gingham ribbon and knotted it for the final touch. I did use black ink to the edges of the card to make it more spooky, the white was just too glaring to my eye.

Hope you will join our challenge this week and add your Halloween project.

Bye, Bye for Now
KIM


Saturday, October 18, 2014

Halloween Mini Album

Today I would like to share a fun little mini I made using 1 sheet of 12 x 12 paper.  I found this tutorial  on You tube here is the link  http://www.youtube.com/watch?v=BCLk-_Q8egQ  It's in German, but she gives you all the dimensions and instruction on how to put it together.

I found that double sided paper or solid color paper works best. Also make sure that your embellishments are not too bulky.  I used a magnet for my closure (make sure to adhere it before covering with your designer paper). Be prepared for lots of pictures.

My cover


First inside flip.


Next flip showing pocket page


Inside flip


final picture of inside
 .

I used DCWV "Bewitched"  paper stack and embellishments. The glittered pieces are from K and Company.  I was able to complete this in a couple of hours.  It might of taken less time if I knew what I was going to use to decorate the pages.  Decisions. Decisions.

Give it a try.  I've made several of these and they make great gifts.  I made one for my Mom for Mother's Day and put pictures of all her children as youngsters and now.  She really liked it.  I also made one for my trip to Charleston, SC.

Leave me a comment if you give this a try and let me know how you used it.

Bye, Bye for Now 
KIM


Monday, October 13, 2014

FUN PUN Challenge # 232 at FCCB

It's time for another Monday Challenge at FCCB.  This week we are making projects with Fun Puns.
For my card I used the Doodlecharm cartridge.  I like the basic cuts on this cartridge, because they can be embellished so easily.  I cut this bear out of four pieces of double sided paper.


After cutting the four bears out of the patterend paper I cut one out of black to attach all the layers to.  I cut the arms and legs first and adhered them and then the ears. I attached the belly last to hide all the intersecting pieces.  I made a bow and blinged it up with a heart and added google eyes. Do you see the little bit of cotton in his mouth. I think it goes well with my sentiment, don't you?

For the finishing touch I added faux stitches to make it look like the bear was sewn together. 

Here is list of supplies I used.
MME Honey Cake 6x6 paper pad
Scrappy Mom's - Bear Necessities stamp set
Doodlecharms -Cricut cartridge
goggle eyes
heart bling
Black Sharpie

Can you think of a Fun Pun? Make a project and link it to our challenge at FCCB.

Bye, Bye for Now
KIM


Monday, October 6, 2014

FCCB Challenge # 231

Hi! Everyone

It's another Cricut challenge at FCCB.  This week the challenge is to make a Birthday card.  Who can't use a stash of already made Birthday cards.  I had someone in mind when I made this card.


I cut the shoes from Cricut Alphabet that came loaded on my Expression 2.  I added some Cotton Candy and Black Diamond Stickles on them to glam them up.  I also used some pink bling.  This is not the type of card I usually make but I know the recipient will appreciate it.

I had a roll of Zebra striped Washi tape and never could find a reason to use it until now.  The sentiments are from a stamp set by Fiskars and TPC Studio.  The pink and white chervon is punched using a 2.5" Fiskars punch out of a scrap of paper, YAY!.

Hope you like my glam card.  Create your Birthday card and link it to our Monday challenge.

Bye, Bye for Now,
Kim

OH! by the way I have another Halloween project to share. Click HERE to view my Witch's Hat.
And check back next week I will posting more Halloween projects.

Saturday, October 4, 2014

Witch's Hat

OK here is another Halloween project for you.  I have always wanted to make a Witch's hat. I have seen them on You tube and other blogs and thought they were so fun for a home decor Halloween project.  Here's mine.


It was alot easier than I thought. I used MME "Wicked Merchant Malvado"and it already had a template so I cut it out and put it together.  The fun part was decorating it.  I used a large Prima flower and some of the embellishments from the paper.  Of course black tulle and trim added just the right touch.

Hope you like it. I think I will make a few more and group them together.
Stay tuned for more Halloween projects.

Bye, Bye for Now
KIM

Monday, September 29, 2014

FCCB Challenge # 230

Tired of the old traditional square or rectangle card. Here's some inspiration to make a Shaped Card which happens to be our challenge this week at FCCB.  I used Elegant Edges cartridge for my basic shape.  Then I cut out my embellishment piece using Celebrate with a Flourish. I like this cartridge because it only has four cuts for each image and they are easy to assemble.


I also finished the inside of the card using stamps from My Creative Time.


Here's a list of supplies used.

Black cardstock- base of card
Orange and black polka dot paper-scrap
Images cut using paper scraps- Yay!
Stickers from Halloween stash
Yellow bling
Stickles Lemon and Black Diamond
MCT-All Around Halloween

Hope you like my card. It was fun to make cause I love Halloween.  You will be seeing a lot of Halloween projects on my blog.  I pulled out my Halloween box of goodies. I'm making (Halloween) things, like treat boxes and decorations so I will be sharing them.

Make your shaped card and link to our challenge, looking forward to see what you create.

Bye, Bye for Now
KIM


Monday, September 22, 2014

Challenge #229 Sketch

Hope everyone is feeling crafty. Our challenge this week at FCCB is to use a sketch for your project.

Here is my card for today using Cricut cartridges Cricut Sampler and Elegant Edges.


 Challenge #229: Sketch


For my card I used DCWV "Whimsy" paper stack.  The scallops were cut using Elegant Edges and the Thanks sentiment was cut using Cricut Sampler.  I inked all my edges with Tim Holtz Distress Ink "Iced Spruce".  The flower is Prima.  The banners were cut free hand.

Be sure to use the above sketch as your inspiration.  Include at least one Cricut cut and link to our challenge at FCCB.

Bye, Bye for Now
KIM

Saturday, September 20, 2014

NIFTY NOTE CARD BAGS

Wanted to share with you some cute little note card gifts I have been making.  These cards are 3x3 and are perfect for sending a note to someone or putting in a gift.  They are quick and simple to make.


Here are the note cards. I made a set of four for each gift bag.  For the papers I used DCVW Mariposa 8x8 pad.  The Fleur de Lys is a stamp by TCW (bought at Tuesday Morning).  I used Rangers Perfect Pearls in gold.  In the lower right hand corner I attached three pink flat back pearls.


This is the presentation gift bag. I stamped a Fluer de Lys with Staz On black ink. This works best. Other inks will work but they must be completely dry or they will smear.  I made the embellishment using the same papers and my MCT die "Scallop & Stitched Circle".  I stamped another Fluer de Lys and fussy cut it.  The finishing touch is a hand dyed seam binding in pink to coordinate with the pink and black color scheme.

Hope you like this gift idea. Please leave a comment below and tell me what you think and maybe suggest some more themes.  The recipient of this set is a huge Saints fan, but I wanted the colors to be feminine.

BYE, BYE FOR NOW
KIM


Monday, September 8, 2014

Mix and Match Challenge # 227 at FCCB

This going to be a short post right to the point.  Kinda busy with work this week so not much time.

Here is my card using G45 Botanical Tea three different patterned papers from the 6x6 pad and Elegant Edges Cricut cartridge.


Pretty and simple. The image is from Gecko Galz "Tea for Two" collage sheet. 
                 A piece of ribbon and that's it.

Join us this week at FCCB for the challenge and link up.  
 Bye Bye for Now
KIM

Monday, September 1, 2014

Kid's Theme Challenge # 226 at FCCB

My Kid's Theme card for today's challenge is made using Kate's ABC's.  I love all the cute images on this cartridge.  When I saw the different images with cats I knew I had to use one since I love cats.


I have been trying to use some of the scraps I have accumulated to make my projects so most of the papers I used are from different collections. Instead of the flowers cut from the cartridge I used some white Prima flowers and yellow bling for their centers.  This yellow seam binding was the last piece of some I dyed for another project. The alphabet letters spelling CAT are from K&Company.

Hope you like my adorable cat.  Check out FCCB blog to get inspiration from the Design Team and create your own project and link it up to the challenge.

Bye, Bye for Now, 
KIM

Monday, August 25, 2014

Challenge #225 at FCCB, Back to School

Sorry I've been missing in action. Had some health problems, but feeling much better and back to crafting.  I know a lot of you are busy getting little one's off to school.  My boys are both grown so they are not going to school but, I have nieces.  I alway try to make them something for their first day, such as a book mark, treats with tags or a card. Here is my back to school card for this year.


Here is the inside, I will be writing some encouraging words for them.

The Cricut cartridges I used are:
Cricut Sampler (school bus)
Ribbons and Rosettes ( paper edge)
Kate's ABC's ( letters)
I also used the following supplies:
Your My Sunshine DCWV paper stack
Kraft paper for base
Brads from my stash for wheels

I had fun making this card. It brought back memories for sure.  
Hope you will join us for this challenge and link up your project.

Bye, Bye for Now
KIM


Monday, August 4, 2014

BUG OUT, Challenge # 222 at FCCB

SUMMER! Many things come to mind, days at the beach, vacations to cooler climates, picnics and cook outs and BUGS!!!  This week the challenge is to use a Cricut cut to make a project with bugs.  Here are my ants from Kate's ABC's to devour watermelons.


The background paper with the watermelons is from DCWV, "Summer Days".  I cut three ants out of black scraps and used glossy accents for segments of their bodies. I used two sizes of whole punches to create their eyes.  I found this button in my stash and it looks just like a watermelon to me.  The final touch, leftover yellow and pink crinkle ribbon.  Fast and easy summer card.  Sometimes the paper background can make a simple card more interesting.

Now it's your turn to make a project using the Cricut.  Link up to our challenge at FCCB and share your favorite bugs with us.

 Bye, Bye, for Now
KIM

Monday, July 28, 2014

Take Me Out to the Ball Game Challenge #221 at FCCB

This was a difficult challenge for me because I do not have any Cricut cartridges that have a sports theme.  I do have lots of baseball pictures from when my boys played baseball, so I made a layout for today using elements from Elegant Edges and George and Basic Shapes.


This is my son Derek.  He played for Hankin's Lumber this year and they went all the way to the area championship game and won.  The reason I started scrap booking was to preserve memories of my boys.  Just gathering the pictures brought back the fun times we had at the ball field.

For my 8x8 layout  I chose the team colors for my background papers, maroon and gray.  I cut the gray layer using Elegant Edges.  For my baseball I cut a circle using George and Basic Shapes. I drew the red stitches and dirtied it up using Vintage Photo distress ink by Tim Holtz.  The striped paper was from a sports theme paper pad from Marcella by K (old from my stash).  My journaling spot was another cut from the same image in gray only smaller from Elegant Edges.  I added some star and baseball stickers to embellish and added my picture. 

So next time a challenge at FCCB has you stumped think outside the box.  You don't always have to have 
the exact cartridge for the theme. Let your creativity flow and link up your project to our challenge this week.

Bye, Bye for Now
KIM

Monday, July 21, 2014

Challenge # 220 Wet and Wild

The challenge this week at FCCB is to create a water related project.  I used Create-A-Critter Cricut cartridge to cut out the seahorse for another project were I was making mutilpes of the same thing.  What was left over was this negative cut which I thought would make an interesting card.  Here it is


Here is a list of the supplies I used
DCWV- Beachside coordinations paper
G45 Botanical Tea paper
EK Sucess border punch
Embellishments-shells, starfish, flat back pearls and twine

To make the By the Sea banner I cut strips of the Botanical Tea paper in to the different shapes and adhered some glitter alpha stickers.  To string the banner I used a small hole punch and threaded blue hemp through the holes.  I attached it to my card with little button brads from my stash.

Hope you will join us for this fun challenge.

Bye, Bye for Now
KIM


Monday, July 14, 2014

Day at the Beach Challenge # 219 at FCCB

Summer is here and that means spending time at the beach. I kept my card clean and simple (CAS).  I used the Create a Critter Cricut cartridge for my wagon.  The beach balls are punched with a circle punch from different color scraps of paper and pieced together.


Summer always makes me think of 4th of July so I used some red and white twine and a star brad on my card as a hint to the holiday.  My sentiment is free hand with a black Sharpie. Quick and easy so I can spend more time at the beach, not really. I'd rather be inside where the air conditioning is running with a good book.

Hope you play along with our challenge and link up your beach inspired project. Have fun and do what you like for summer.

Bye, Bye for Now
KIM

Monday, July 7, 2014

SUMMER TREATS Challenge #218 at FCCB

I can think of lots of cool summer treats, but I know everyone loves ice cream. My card for today features a strawberry sundae with chocolate sauce and a bright red cherry.  Remeber those metal dishes they used to serve them in at the soda fountain? That was my idea for the dish. Doesn't it look good enough to eat. YUM!


I used the following supplies to make this delightful confection.
Cricut cartridge Kate's ABC's
DCWV Kidlets paper stack (backgound and border)
DCWV metallaic paper stack (Dish)
Brown, pink and red paper scraps
Lemon drop twine
yellow hand dyed seam binding
American craft button 
Glossy accents and stickles.
My Pink Stamper Sweet Goodness sentiment stamp

Join our challenge this week and link up your favorite summer treat.

Bye Bye for Now, 
KIM


Friday, July 4, 2014

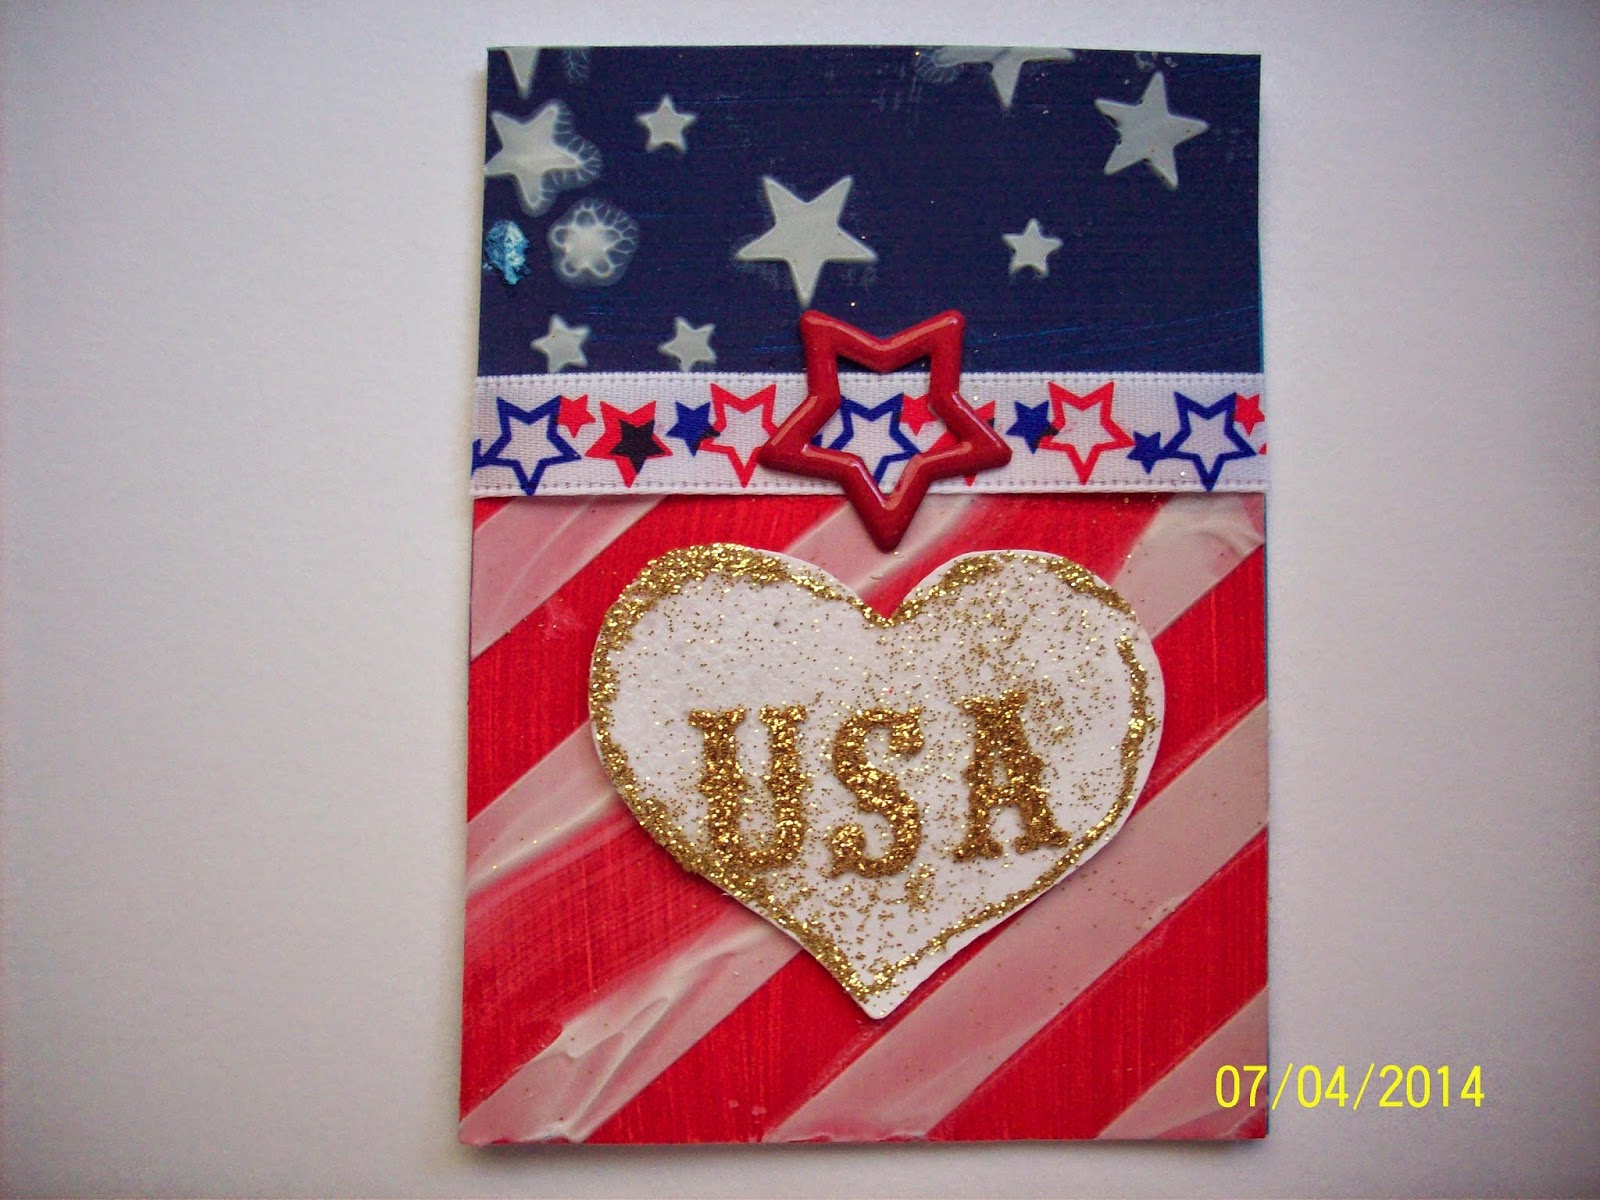
Happy 4th of July

Hope everyone has plans to celebrate our Independence, lots of good food and fireworks.  Today I am sharing an ATC that I created using red and blue paint. The white stars and strips are modeling past using Hiedi Swapp stencils. I cut the heart using George and Basic Shapes and embellised with gold glitter and stickers.  I used a scrap of ribbon and a star shaped brad, too.


Hope you have a wonderful day. Thanks for stopping by.

Bye Bye for Now, Kim

Sunday, June 22, 2014

Altered Book

Hope everyone is having a creative weekend.  I have been working on a challenge project for 2 Shabby Sisters Studio.  The challenge is to alter a book.  I have to say it was very hard for me to cut up a book to make the inside.  It was an old book from the flea market, so I know it was well read.  I kept telling myself I can use all the pages in other projects.  So here is a picture of the final project.


I decided to make a baby keepsake book.  The papers I used are Anna Griffin.  Here is a list of the embellishments I used
Anna Griffin stickers
Graphic 45 door plate and knob
Graphic 45 keyhole
Recollection flowers (white)
Steam distress ink (dye flowers)
Antique white paint (distressing and flowers)
Martha Stewarts (rocking horse and alpha stickers)
Recollections bling and lace
Rosette and Ribbon Cricut cartridge (Rosette)
Modge Podge frames
Offray blue gingham ribbon

 Here are more pictures showing details.


And now the inside.


Hope you enjoyed my book.  I love the way it turned out. I plan to put little mementos inside from when my son was born, such as his bracelet from the hospital. Those kinds of things.

Bye, Bye for Now
KIM


Monday, June 9, 2014

Challenge #214, Celebrate DAD

Hope everyone is having a creative day.  I don't know about you but sometimes I have a creative block and then other times it flows so freely I can't keep up. Do you have days like that too?
I knew I needed a Father's Day card so it was easy to make this card, because I know how much my step-father loves old cars. At one time it had a shop where they refurbished old cars, but now he is retired.  I think he will like this one, a classic "Woody".


The Cricut cartridge I used was Elegant Edges. I cut the shape in two colors of paper, brown and brown plaid and layered them onto a Kraft card base. The car image is cut from a Gecko Galz collage sheet. I also used the collage title "Your A Classic" as my sentiment. I had a piece of adhesive ribbon I used. I have been trying to use up some of the scraps in my stash on everything I do. I had to make the banner and write it freehand. Can you believe it, I don't have a stamp for Father's Day.  The finishing touches, black flat back pearls in the corners and black faux stitching.

Hope you join the challenge this week by linking to our Father's Day challenge.

Bye, Bye for Now
KIM

Monday, June 2, 2014

FCCB Challenge #213, Replenish your Card Stash

Our challenge this week is to make a card to replenish your card stash. So just about any type of card will do. Do you need Birthday cards, baby shower cards, or anniversary cards? This is your chance to share them with us at FCCB.  Today I made a card that could be used just to send a quick note to some one.


I used Cricut Sampler for my poodle cut. 
 I have always like brown and pink together as a color combo. My base card is brown. My backgrouns is not cardstock it's a napkin. I used Mod Podge to decoupage the napkin to a piece of white cardstock and adhered it to my card. As you can see it has a Paris theme, so a French poodle seemed a logical choice. I cut the poodle at 3" and pieced it together using pink and white paper. I used Diamond Stickles for a little glitz on the white paper. My sentiment is from one of our sponsors Scrappy Moms. I added a ribbon and a little button. 

Join us this week and add a few cards to your stash. Have fun and create.

Bye Bye for Now.
Kim

Sunday, June 1, 2014

Altered Canvas "Dream"

Hi! everyone. Just finished an mixed media altered canvas and wanted to share. I used a 6x6 canvas. My image is a collage image from Gecko Galz. Here it is


First I used gesso to prime my canvas. Then I used texture paste and a stencil by Heidie Swapp.To achieve the striations I used a plastic knife. Next I stamped randomly with a script stamp. After that I used the colors in the image to spray my background with Lindy Stamp Gang "Nantucket Pearls".  I also sprayed the white flowers I got at Michael's with "Nantucket Pearls".  I used Salt Water Taffy, Cape Cod Coral and Sea Grass Green. The colors matched perfectly. I then used a purple metallic Gelato to deepen the color.

As you see I used a lot of embellishments, lace, punched border,  pearls, buttons, butterflies, metal findings, glitter and banners.  The sentiment Dream was from my stash. It seemed to express the mood of the image. Here is a close up.

Hope you like it. It was lots of fun to make.
 Leave me a comment and tell me what you think or if you have any questions about the products I used. 
Thanks for looking and have a great evening.

I am entering this into two challenges:
and

Bye, Bye for Now,
KIM


Monday, May 26, 2014

FCCB Challenge #212 For the Graduate

HAPPY MEMORIAL DAY

Hope everyone is having a wonderful day. The challenge this week is to make a card for a graduate. This year I don't have a graduate.  The area school colors are red, black and white so I made a card using those colors. The Cricut cartridges I used are Wild Card for the cap and diploma and Elegant Edges for the layers of black and red.


The letters and numbers are Thickers. I made the red tassel using embroidery floss.  The sentiment is a Fiskars stamp set.  I tied a white ribbon around the diploma and used pop-dots for dimension for it and the cap. Four black half back pearls in each corner finished the card off with some bling.

Hope you like my card and will join us for the challenge this week at FCCB.

Bye Bye for Now
Kim

Monday, May 19, 2014

MAY FLOWERS AT FCCB

IT'S CHALLENGE # 211 THIS WEEK.  The theme at FCCB is May flowers.  For my project I made a card using the Kate's ABC's cartridge that I recently purchased and I love it. It has so many cute images.


I used glitter paper for some of the layers but it's hard to see in my picture. The papers I used for this card  are scraps from my craft room. Lately my scraps have been building up so I decided to organize my leftover pieces  from other projects and use them. The only new piece of paper is the pink cardstock for my base. 

I cut the image at 3.75 inches so it would be large enough to be the focal point. The sentiment banner is stamped with a MCT set, "Bloom Where You Are Planted". I used Tim Holtz "Vintage Photo" to stamp my sentiment and distress everything. The pink sheer ribbon is leftover from the baby banner I made awhile back, it was just enough to tie the bow.

My goal for the next few months is to use as much leftover paper as possible. Join our challenge this week and have fun making a project with flowers. 

Bye, Bye for Now
KIM