Shop Now

Friday, December 28, 2012

Christmas Themed Stickpins

I would like to share some stickpins I made for a swap at 2 Shabby Sisters Studio.  The theme was Christmas. Here is my packaging for the stickpins.  I made a matchbook type holder.


And here are the stickpins.  We  had to make 4 sets of three pins and one had to have a charm.


I love the way the blue and white one turned out.  The gift bead was so cute. Hope everyone enjoys them.

I plan to do a lot of projects this weekend.  I want to use some of the great gifts I received in the 12 days of Christmas swap.  Try out some of those inks and maybe make a mini album. I actually have 4 days off. My craft room is all set up and unpacked so, a crafting I shall go.

Bye Bye for now,
Kim

Tuesday, December 25, 2012

12 day of Christmas Day 12

Final day.  I have had so much fun opening my presents and seeing what was in it each day. For the last day I wanted to give Rhonda something special.  I found this 12 Days of Christmas charm bracelet.  I thought it was a perfect ending.

Day 12


For my last present Rhonda gave me a lot of Glitter and different colors.  Love all the shades of blue.  Blue is my favorite color.  

I have truly liked everything she has made and bought.  It was lots of fun.  There are some very talented ladies at Scrapin Vintage.  Check this site out if you want a try at swaps.  Great way to make new friends that love to craft.  Some of my friends don't really get it even though they are polite enough when I show them something I've made they don't really appreciate the time and effort it somethings take to create.

Well hope you have enjoyed the last 12 days as much as I have. Check in now and then. 
Bye, Bye for now
KIM

Monday, December 24, 2012

12 Days of Christmas Day 11

Here is day 11.  I gave my swap partner 11 chip board Christmas embellishments.  She likes vintage so I picked those that where blue and had a vintage look.

Day 11


 For my gift she made a pin cushion and stickpins.  I think this boot is adorable.  I love the toile` pattern.  It looks very vintage to me.


One more day and one more gift.  Can't wait to see what it is.  Check in tomarrow and see. 
Bye, Bye for now.
KIM

12 Days of Christmas Day 10

Yes it's already day 10, only two more days left. I'll open day 11 later.  I have been waiting to open my gifts each day.  It's been hard believe me.  Here is what I made for Rhonda.

Day 10

Here's the outside packaging. On the inside, stickpins.

And here is what I received from Rhonda.


Everything I need to make a mini album.  Includes a 6x6 paper pad, alpha stickers, embellishments, stamps and flowers.  I think I could make a cute Valentine mini using just these items. Cool, don't you think Rhonda did an excellent job.  

I'll be back later to post day 11.  Only one more day to go.
Bye, Bye for now
KIM


12 Days of Christmas Day 9

I'am Back.  For day 9 I made a chunky dangling charm for Rhonda.  I put 9 charms and other beads with a ladies theme.  Here is a picture, yes I did remember to take a picture of this.

Day 9


And here is what Rhonda sent me.

Lots of BLING!!!!!.  Love these embellishments.  I can use them on all kinds of projects, there is such a variety. Rhonda has been a great swap partner.
  
Bye, Bye, for now
KIM

12 Days of Christmas Day 8

I know everyone can relate, I've been really busy so I didn't get back to post Day 8.  For my swap partner I sent her 8 milk choclate goodies.  She told me she liked Snickers so I sent her Snickers and some other chocolates I thought she might like.  I put them all into a cute little pail.

Day 8


My swap partner Rhonda sent me 8 different types of mists and inks.  I have not used Smooch products before, so this will give me the chance to try something new.  I needed some red Stickles, too.  Can't wait to try these out.  

Well that's it for day 8 be right back with day 9.
Bye, Bye for now, KIM

Friday, December 21, 2012

12 Days of Christmas Day Seven

Yesterday was day seven.  Took pictures but didn't have time to post. Here is what I made for my swap partner, Rhonda.

Day Seven


I made these seven tags for her.  I have been trying some new techniques with inks. My challenge is to try making a monochromatic tag but its harder than I thought it would be.  I am going to keep trying it.

 Now for what Rhonda sent to me.  Love the paper she used on the altered matchbox.  The dangling charm is so pretty.  Love the key and domino.  She altered a clothespin and also made a stickpin.


I'll be posting day eight later. Thanks for looking.
Bye, Bye, for now
Kim


Wednesday, December 19, 2012

SHAPED CHRISTMAS CARD CHALLENGE AT FCCB

I have been busy crafting Christmas cards and when I saw the challenge at FCCB I thought I would enter with a card I made using the Noel Christmas cartridge.


The door is cut at 5 1/2 " out of textured red card stock. The shifted cut is white card stock for the panes.  I used a silver glitter pen for the door handle.  The acetate wreath is from K&Company. To make the card I cut the shape in white on the blackout feature twice.  I glued the two pieces on one edge for the hinge so it would open.
Back to crafting working on a stickpin swap.  I'll post them when I am done. 
Bye, Bye, for now
KIM

12 Days of Christmas Day 6

Half way through, this is going fast. I want to share what my partner in the 12 Day of Christmas swap at  Scrapin Vintage made for me today.

DAY SIX
 Don't you love these crocheted snowflakes?  I think they are gorgeous.

For my gift to her I bought six different crafting items, bottle caps, tiles, stickers, trims and flowers. Hope she can use them.  I'll be back tomarrow for day seven.
Bye Bye for now, 
Kim

Tuesday, December 18, 2012

12 Days Of Christmas Day Five

 I sure wish it was colder here in Mississippi because I sure love Chocolate.  MMMMMM ! Hot Cocoa.

DAY FIVE

 Once again I failed to take a picture of what I made, This is similar except I but a monogram on the ornament instead of a snowflake.


Short post tonight have to make stickpins and I'am way behind.  Keep checking back.
Bye, Bye for Now,
Kim

Monday, December 17, 2012

12 Days of Christmas Day Four

It's day four and I don't have a picture of what I sent my swap partner.  I purchased four birds that where covered in gold sequins.  I thought maybe she could use them on a project.

DAY FOUR

I was so delighted when I opened my day four package.  Inside I found these beautiful Christmas tags made by Rhonda.  Don't you think she did a great job? 

I love this reindeer.  I like the way she put the wreath around the reindeer's neck.  Love the red gemstone for his nose.  It looks like she distress inked the tag.
I wonder if she cut this frame with her Cricut? The background of this tag also looks like she distress inked it. Love the pipe cleaner candy cane.
Beautiful snowflakes.  The pattern on the paper looks like it embossed and glittered.


The last tag is embossed with snowflakes.  Love the pop of red with the ribbon.

Well that's it for today.  Come back tomarrow for day five. Can't wait to open another gift.  And yes I am waiting for each day.  Believe me it isn't easy.

Bye Bye for now, 
Kim

Sunday, December 16, 2012

12 Day of Christmas Day 3

Just as I suspected the newer post are showing up first so you will need to scroll down to start with Day1.  Now onto Day 3 of the swap at Scrapin Vintage

DAY THREE

For this day I decided to go with a French theme. Day three is Three French Hens so I thought Paris and the Eiffel tower. I bought note cards and sticker sheets with a Paris theme. Unfortunately I did not take a picture.  Seems I only took pictures of items I made.  But really the star of the day is what item I received from Rhonda.


Aren't these spays Gorgeous!!!!!!!.  Rhonda made three.  I have to say my favorite is the flowers.  The Christmas colored one in red and green will be perfect on a Christmas mini album which I know I will be making as soon as the Holidays are over. I also like the vintage bag.

So that is it for today.  I will post Day 4 tomarrow so check back.
Bye, Bye for now, Kim

12 Days Of Christmas Swap Day 2

Here is Day 2 as I promised. You might have to scroll down to see Day One.  For Day 2 we had to make or buy two items. I decided to make altered picture frames.  The first one I did in black and white. The second is my swap partners color choice of blue and white.

DAY TWO   

I painted the frame which I bought at Walmart black then I covered it with paper in a harlequin pattern from DCWV Halloween stack Midnight Spell. I applied it with Mod podge.  After it was all dry I attached black braid trim to the edge.  The flowers and brads are from Paper Studio.  I used more mod podge to shape the flowers they were very flat.  The bling is from Recollections at Micheal's. The sentiment is a stamp by Emma at My Creative Time called Just Simply Live.


Here is the white and blue frame.  I painted it white and then added the snowflakes. The large ones are from Paper Studio and the smaller ones are from Jollee's stickers.  I used a blue glitter pen to draw the lines around the inside and outside edges. The word stickers in a white glitter are from Glitz & Glitter. Even though the snowflakes were from different makers they fit together well.  This will be a fun frame for winter pictures not just for Christmas.


Here they are side by side.


Now for what my awesome swap partner Rhonda sent me.
HUNKA, HUNKA CHOCOLATE!!!!!

Have you ever seen a Reese's this big before? Not me. I bet I can eat the whole thing though.  It may take a few days but hey I' m up for the challenge.

Hope you enjoyed, be back shortly for day three.  Then tomarrow I will open day four and post it.
Bye Bye for now,
Kim


12 Days of Christmas Swap Day 1

Hi! Everyone.  Its finally here the day we get to open our gifts.  The swap was 12 Days of  Christmas at Scrapin Vintage.  We were to make either a handmade item or buy something.  For each day we were to have that many items for example on day 1 one item for day 2 we had to have two items. You get the picture.

We started on December 14th  and will end on the 25th of December.  I am a few days behind because I was working and could not pick up my package until Saturday morning. Then I had to take pictures and my battery was dead. Finally I was able to take pictures and put them on the website.  Since my partner Rhonda now knows what I sent her I will post mine and hers.

DAY ONE
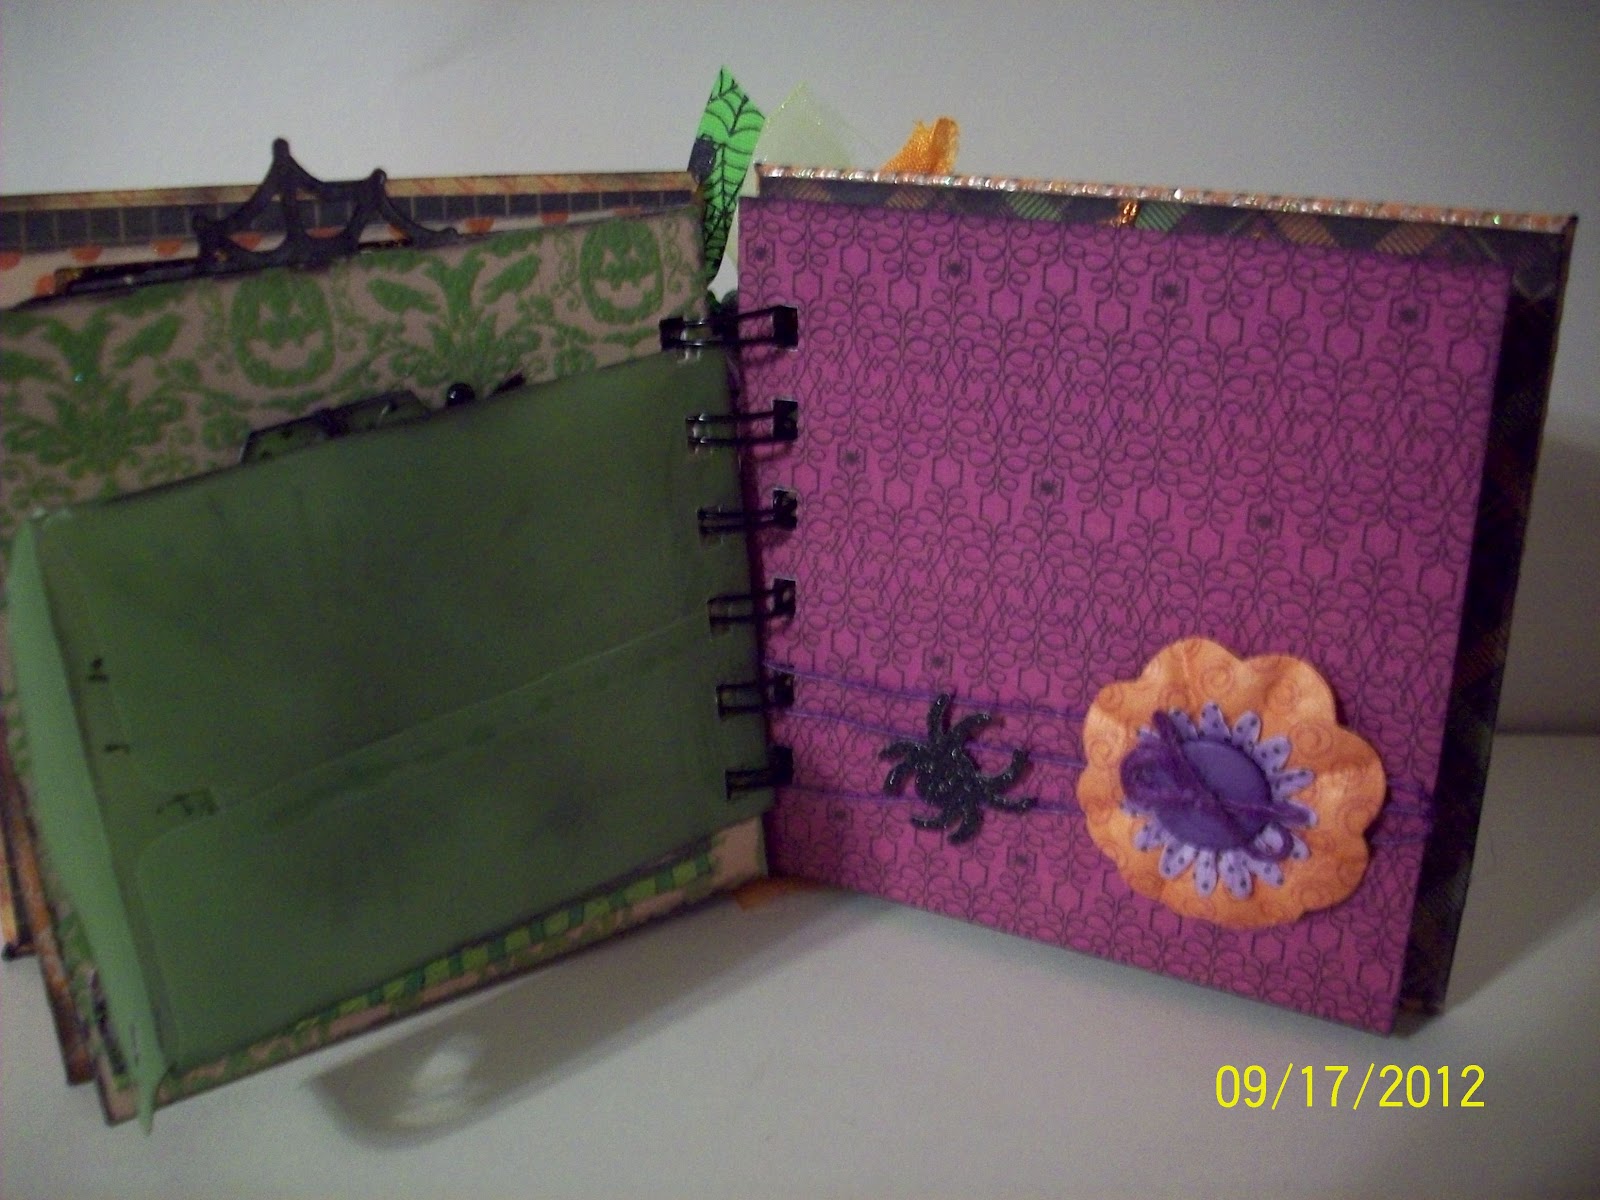
This is what I made for Rhonda. I altered a little wooden box I bought at Joann's.  I wanted the entire thing white.  First I painted the box and then covered it with embossed paper. I then glued trims and flat back pearls around it. I made the stick pin and arranged the flowers and ribbon in one corner. I used little resins roses on parts of the embossing that looked like the center of the flower design in the paper.


 Here's a view of the top showing the details. You can see the embossing much better in this picture.


This picture shows the details of the inside which I covered with paper and a picture. I also used more flowers and ribbon.   My swap partner wanted blue and silver rather than the traditional red and green. That was a challenge for me since I really like red and green Christmas colors. The blue and white bag of beads and charms I ordered off of e-bay.  They were so gorgeous I hated to give them away, solution, I ordered myself a set.  That seller is emmasproductions.


This is the first time I have altered a box and I really like the way it turned out.  I enjoyed making it so much I have entered a one-on-one swap at Scrapin Vintage for an altered trinket box for January.  That will be a lot of fun.

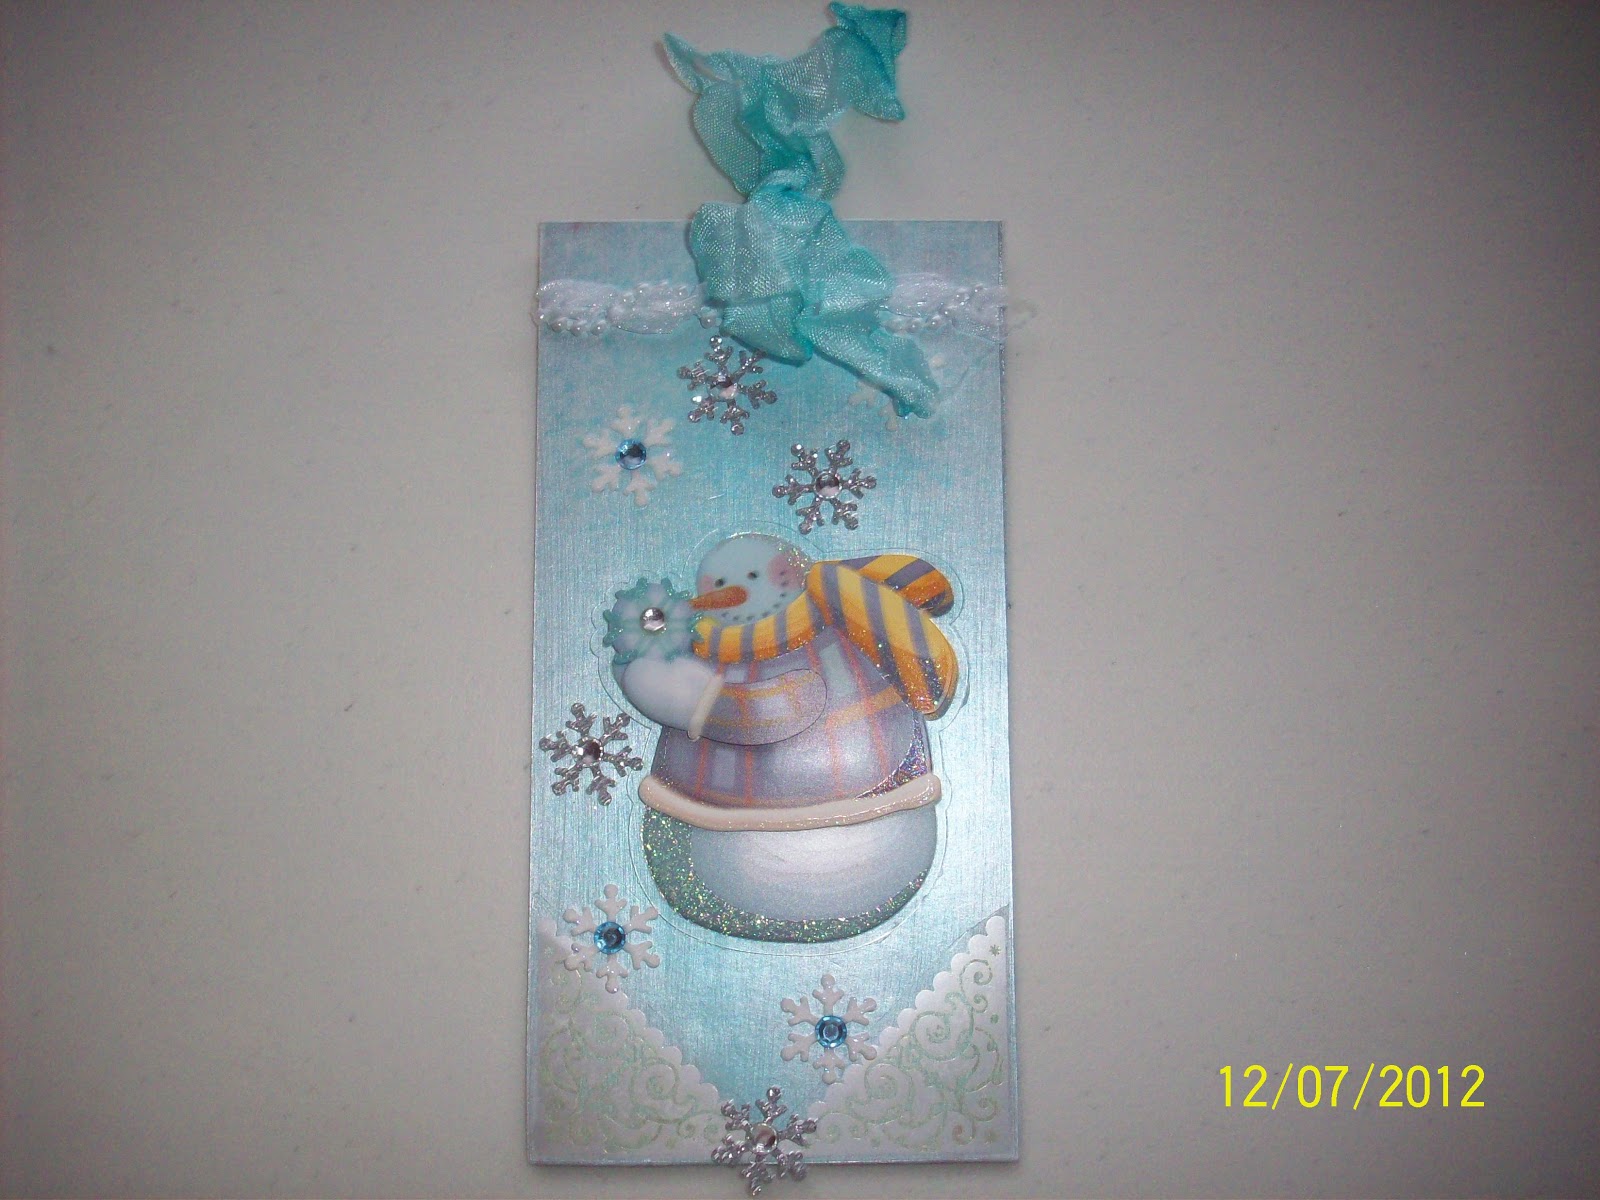
Now for what I got from my swap partner. Isn't it beautiful and yes it is red, which is what I communicated to her as my color preference for Christmas. Now all I need is a holiday picture to put in it.


Well that's Day One. I will be posting Day Two later. Have to catch up with everyone else.  After today I will be caught up and will post on a day to day basis.

Hope everyone is having fun crafting for the holidays. It really gets you into the Christmas spirit. Put on some classic Christmas music and craft away.
Bye, Bye for Now,
Kim

Sunday, December 9, 2012

I'm BACK with a project for FCCB

Finally moved and unpacked the essentials, my craft room. Missed my Cricut while it was in storage.

The challenge for this week at FCCB is snow.  I used my Christmas Noel cartridge to cut the snowflake at 2" out of vinyl. Since it was sticky on the back it adhered real well. It was flexible too so it fit around the ornament. I bought the ribbon and ornament at Walmart. I also bought the bells as a necklace and took it apart.   The jewel embellishments are from my stash.

The trick to coating the inside of the ornament is to use Glitter-It by Beacon. I used Martha Stewart glitter blueberry slush.

I made several and it didn't take long at all. I will be giving them as gifts. Now that I have everything unpacked I will post more often.

Have a great crafting day.
Bye Bye,  Kim


Thursday, November 22, 2012

HAPPY THANKSGIVING

Hope everyone is having a wonderful holiday and sharing it with loved ones.  I don't know about you but I plan to craft this long weekend. I Do Not shop on Black Friday. Late Friday afternoon I might go to Joann's for some deals, Maybe!!!!

I am moving so I have been living out of a suitcase so to speak, but I did fix a small crafting box.  The bare essentials really.  I can still craft though.  I have made several of my 12 Days Of Christmad items out of that box.  

Here's a tip.  I didn't think to add my bone folder. Guess what a metal fingernail file and ruler work great on the fly.  I have used the fingernail file and ruler to score a fold.  The handle is nice and smooth and I used it to  to run across the fold to make it nice and crisp. Easy right?

After my swap partner opens her gifts I will be sharing the hand made projects with you, taking lots of pictures to share.  I tackled some projects I have not tried before and think they all turned out great.

So have a great Holiday and I'll  blog you later.
BYE BYE, Kim


Thursday, November 8, 2012

Toot Toot I'm Tooting my own horn

Really short post.  I'm super excited that I won the design challenge at My Creative Time for Me.  I entered the Halloween tag shown in a few  posts ago.  I usually don't brag but I can't help my self. TOOT! TOOT!

Back to crafting.  Working on some projects for 12 Days of Christmas.  Can't post until after I have mailed them to my swap partner.  Don't want to spoil her surprises. Also working on another challenge project.

Keep busy crafting have fun this weekend.
Bye Bye for now
Kim

Sunday, November 4, 2012

THANK YOU Lil' Cutie

Hi! Hope everyone is having a good weekend and getting in some crafting. I have been working on some 3x3 Thank you cards for a swap at 2 Shabby Sisters Studios.  We are to make 10.  I really like these for saying a quick Thank You.  Also its a good way to use up scraps.  I used a lot of different papers and embellishments I had leftover from other projects.


This is a short post today.  Busy working on projects for a 12 Days of Christmas swap I entered at Scrapin Vintage.  Really having a with this one.  Getting into the Christmas spirit.

Happy crafting and have a good week. Bye Bye for now
Kim

Sunday, October 28, 2012

Designer Tag Challenge My Creative Time

Hi! Everyone.
     I am entering the tag challenge over at My Creative Time. The requirements are that the tag must be 4x6 or larger, any theme and include MCT stamps or dies. My Halloween tag measures 4x6 and I used MCT polaroid die from Just Simply Live. The papers I used are from MME Haunted.


     I made the charm using Tim Holtz trinkets and charm holder. I also made the bead dangles. The center embellishment is from EK Success and the spider web brad is Spare Parts from Paper Studio. The ribbon and bling I bought at Tuesday Morning. I used the alphabet from the stamp set for the sentiment which I distressed and crinkled for dimension. I used Glossy Accents to outline the die.

    I wanted to make this for Halloween before it's over. I like the way it turned out. Hope you all have a Happy Halloween. Be safe and have fun.

    Bye Bye for now, Kim


Sunday, October 21, 2012

Stick Pins

Hi ! Everyone.
This going to be a short post. I've been trying a lot of new crafting ideas lately. First it was mini albums which I am still hooked on. But since I have been making them I have started making stick pins and charms to go on them. I had to learn some jewelry making skills, but it turned out to be really easy. Of course You Tube helped.

Here are some stick pins I made.

I also made a beach theme set for a swap at 2 Shabby Sisters Studio.
I love Graphic 45 papers. This is from On the Boardwalk. I will be making  more stick pins to go on my projects. I just need to build up my bead stash. I have looked on several sites for supplies but not sure which ones to use. If anyone has some suggestions on sites for beads and jewelry making give me a shout.

Next time I will post some charms. I will be making some to go on Christmas albums which I will be making.
I need to locate some Christmas themed charms.

Well that's it for today. Leave a comment if you have suggestions or just want to add your 2 cents.
Happy crafting and Bye Bye for now.
Kim

Sunday, September 23, 2012

Itty Bitty Halloween Mini

Today I want to share a Halloween Mini Album I made for a challenge at 2 Shabby Sisters Studio and a swap a Scrapin Vintage. The album is 4x4 and I bound it with my Bind It All. I made a charm to hang from the rings and used some of my orange seam binding tied to the rings along with ribbon I used inside the album.  There are 6 pages with frames for pictures and tags to journal. I have a lot of photos
 Here is the cover.


This is a photo of the inside cover and the first page.  The little booklet  opens and has a place to put two pictures or to journal.

This next page has a frame I cut with MCT die from the fall release. I used this Halloween stamp/die set for all the stamping in this Mini. I put Stickles around the edges and left the top open to slide a picture in.  The Boo is also a stamp from this release and I cut the vellum envelope from Wild Card cartridge on my Cricut
                                     

Next page shows the tag that is inside the envelope. I used Glimmer Mist but it doesn't show up too well in the picture.The orange page has a photo mat inside. The spider web is the pull. The reverse side has a spot to journal.
The next page is one of my favorites.  I love the witch's hat and shoes and the sticker that came with the paper that say god witch bad witch. By the way the paper stack I used is Bewitched by DCWV. The acetate frame on the opposite page I have had for years and finally found something to use it in. A picture can be slipped inside easily.
This page has a coffin I cut from Happy Haunting. It has three layers, the first is acetate and I traced the flourish onto it with black Glossy Accents. The next is green and black polka dot which you can see in the background and the last layer is black with a skull sticker. The green vellum envelope also has a tag inside. I really like the purple page with the twine as a spider web and the spider.
Here is a detail of the tag. All the brads I used are from Martha Stewart.
This is the last page and the back cover page.  I like the chandeliers and didn't want to cover them up so I glued a sticker from the paper pad on two sides so a picture could be placed inside.  The back cover has another acetate piece, the fence and the house is from the paper pad.  The spooky sticker is from K and Company the same as the witch's hat and shoes. The outside of the cover was covered with paper but no embellishments were added.

Well this has been a long post.  If you've made it to the end I want to say thanks for looking. Please add comments if you like what you see.  I would love feedback. Have a Happy Halloween and keep crafting.

Bye Bye for now, Kim